Sew a top from two fabric squares
Summer in Cape Town is awash with lovely loose unconstructed tops. Which is DIY heaven as they are really easy to cut and make.
 |
| Silver square top |
I’ve made a loose T shaped top – see that DIY here.
How about a slouchy tank top? Click on this link for pattern instructions.
This top is a sort of square shape. You can see from the pictures how I cut the pattern.
 |
| Cut pattern in newspaper |
I’m big on always cutting a pattern first for any DIY fashion project. One reason is if you like the garment you can go mad, as I often do, and make loads more of them.
But also you can tinker with the pattern by folding it in half or quarters to make absolutely sure your pattern is symmetrical. You wouldn’t want a lopsided garment. OK, maybe that could work on purpose, but I digress.
 |
| Sew sides and shoulders |
One other thing I have mentioned is I seldom over-lock or zig-zag my seams. You should. I know. But seems like such a schlep if the fabric is unlikely to fray. However with this fabric I had to zig-zag the edges.
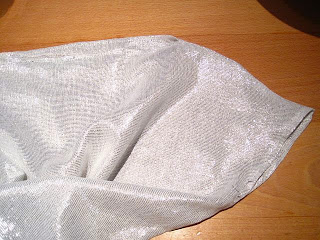
Not sure what fabric it is. I bought it in a curtaining shop. Seems to be a weave of silver lurex thread and something else.
I love, love this top. It’s so forgiving over my tummy after a carb overload. Allow slightly more width
 |
| Cut pattern from fabric |
if you want your top to fall lower on your hips.
So first make the pattern. Lie a T-Shirt on a piece of newspaper and trace around your top with a marker pen. Allow at least 2 centimetres all around for your seams.
Cut the pattern from your newspaper and fold in half down the centre front to make sure it’s symmetrical.
Next cut your pattern from your chosen fabric. I think you are unlimited in your choice of fabric with this top. Loose, floaty and gauzy will work well. As would a heavy denim. If you leave enough space around the armholes you could easily wear a warm top underneath this.
 |
| Fold, pin and sew neck, hem and armholes |
After cutting out, I zig-zagged all around the edges.
Then I pinned the shoulders and sides to make sure I left enough space for my head and arms.
Fit the top (without stabbing yourself with the pins). If you need to adjust the seam allowance to
 |
| Sew sides and shoulders |
make the top tighter or roomier, now is the time.
Sew shoulders and sides. Fold over neck, lower hem and armholes. Pin and sew flat.
Gently press with a warm iron. I used a cloth between my fabric and the iron to prevent the lurex burning. And that’s it!
Look for more DIY’s and crafting ideas in the Greenie Galleries at the top of this page.
See you next week.
Greenie.
 |
| Hems sewn and pressed with an iron |
