
Sewing tutorial for a cloth bag
 |
| Easy tapestry fabric bag |
I’ve raved about this particular style bag so many times.
And made it a good few times too.
Click on these links to see this bag in other fabrics – Green African print cloth bag and Cream bull denim cloth bag.
 |
| Cut 2 x 50 x 80 centimetre pieces plus 5cm notch |
I had some off-cuts left over from when I made my Kimono jacket – see how to make a kimono jacket here.
 |
| Stitch sides, fold over and stitch bottom |
This tapestry fabric is robust.
Perfect for a bag.
So I decided to make yet another cloth bag.
I had to sew a few pieces together to get the right size pattern piece.
Was slightly worried that this would be a bit obvious with a print fabric but you can’t notice it when I’m wearing the bag.
Here’s how you make it:
 |
| cut-out |
You need: –
scissors
pins
sewing machine
fabric
matching thread
 |
| Sew cut-out flat |
You do: –
Cut two 50 x 80 centimetre pattern pieces.
Cut out a 5 centimetre square in the middle bottom of each pattern piece.
Sew halfway up the sides from the bottom.
Fold over, so side seams lie on top of each other, then sew across the bottom.
 |
| Sew shoulder seam and hem edges |
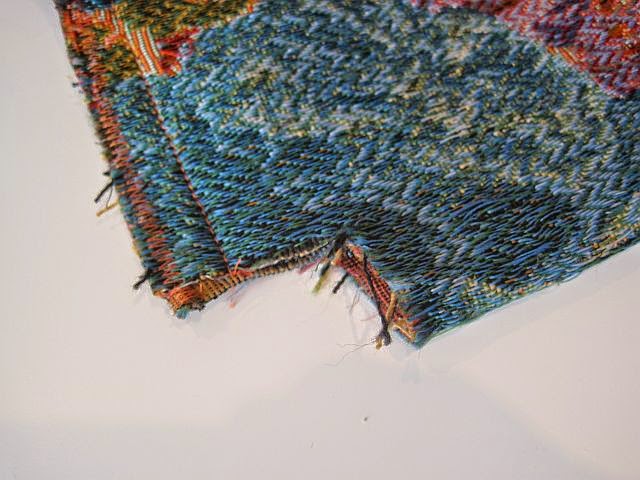
Fold cut-out corners flat and sew across them to create a box shape at the bottom of the bag.
Now place top ends of bag together.
It looks as if the strap is going to be far too wide, but don’t worry.
Sew across top end of bag.
 |
| Fold shoulder over and sew ends together |
Fold top of bag in half and pin in place.
Either hand sew or machine sew it in place.
Fold in half again, and again either hand sew or machine sew in place.
Neaten or hem any raw edges and then press with an iron.
That’s one handy and gorgeous bag complete!
 |
| Fold should a second time and sew together |
Visit the Greenie Galleries at the top of this page to see older DIYs.
I’ve shared myriad fashion upgrades from FREE sewing patterns to tutorials for making jewelry from anything such as food packaging or rope.
As always, I try to up-cycle or recycle.
I will be back with more next week,
Greenie.