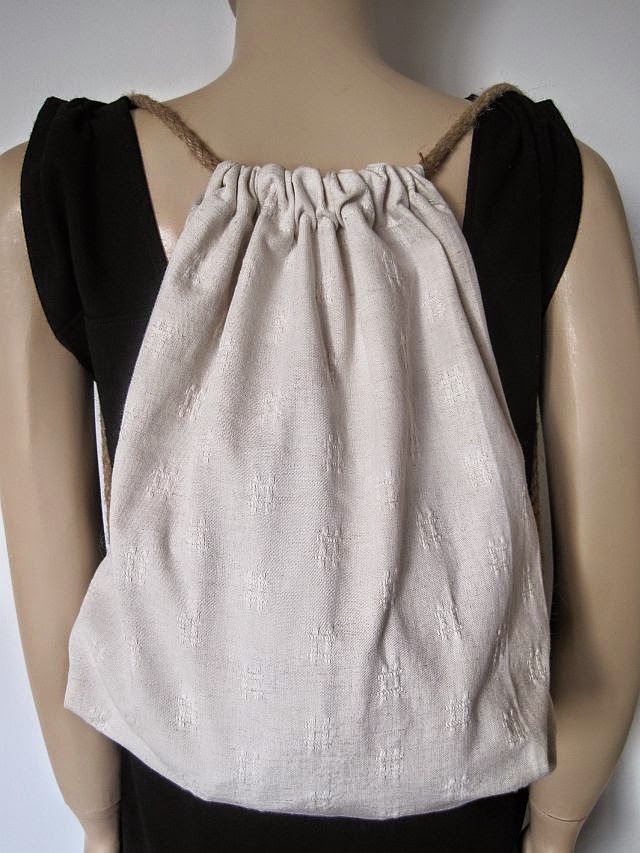
How to make a backpack
 |
| Easy back pack |
I’ve been wanting to make a small back pack for a while. Love, love the Alexander Wang version. I wanted to use natural rope as I had some textured curtain fabric left over from the Kimono top I made a while back. See that – on this link.
I should rather have used a nylon rope that would slide easily
through the fabric, something natural rope does not do. And I needed a slightly lighter fabric. The ex-curtains were a bit too thick. But hey, I will know that for next time. And you know that before you start.
 |
| Back pack pattern |
There are heaps of back pack tutorials out there. I love the one on Martha Stewart’s page and also the one on Purl Bee. Here is my version –
You need: –
fabric – see my pattern for amount
rope – I used about 1.7 metres
sewing machine
scissors
pins
matching colour thread
You do: –
Cut fabric.
Hem all around the edges.
 |
| Cut bag from fabric |
Fold over the two tops of the bag. Approximately 4 centimetres. Your rope needs to be able to slide through these folds later.
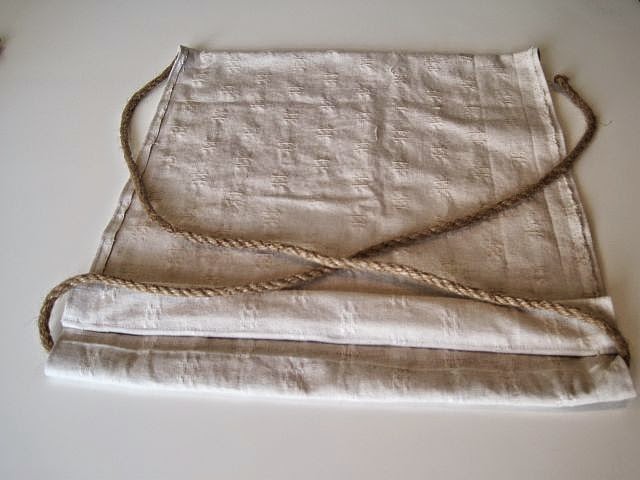
Please look at my photos so you can see how the bag is assembled. It’s important to get your folds and flaps working the
 |
| Sew all around edges |
right way or you will have to unpick them and re-sew.
Sew your folded ends or flaps down making sure you do not sew the ends closed.
 |
| Fold over top ends |
Now fold back pack in half. You want to sew the sides, but before you do that, you need to make sure there will be enough space for your rope to fit in at the bottom of each side.
 |
| Sew casing flat leaving ends open |
Slide your rope into the bottom corners and pin where to start sewing. Remove rope.
Sew your side seams making sure you stop before you get to the folded over piece at the top of your bag.
Next, take your rope and slide it through the one fold. Only ONE piece of rope here.
Pull the rope through and make sure each end is the same length.
Now pull both ends of rope through the other fold so they cross past each other inside the flap. TWO pieces of rope here.
 |
| Allow space for rope at bottom edges. Sew sides |
Next take the rope inside your bag and slide it through the two holes at the bottom end.
 |
| Slide single piece of rope through flap |
Pull bag closed and fit to make sure your ropes is not too long or two short.
 |
| Fold each ends back through second flap |
Knot the ends of the rope and either machine sew or hand sew the rope in place. The thinner the rope, the easier it will be to sew with a sewing machine.
 |
| Knot rope |
Turn inside out. Press with an iron. And you’re done!
You can add a pocket to the front of your bag. You do that before you sew the sides together.
Find older tutorials and FREE sewing patterns in the Greenie Galleries at the top of this page.
I will have more DIY fashion for you next week,
Greenie.
 |
| Sew knotted end in place |
