
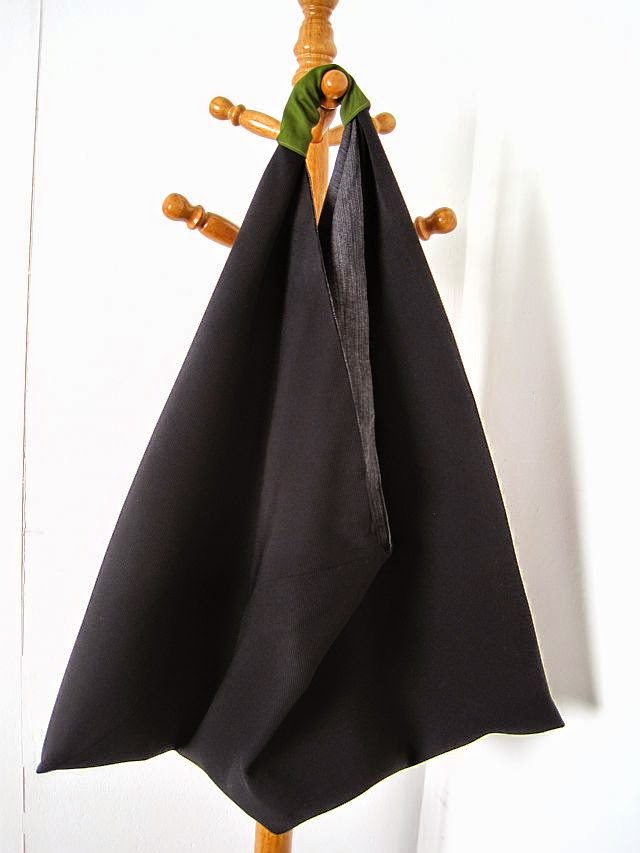
Sewing instructions for a triangle hand bag
I have been wanting to make this bag for sooo long. There are a few tutorials to be found with
 |
| Triangle bag |
instructions for making this bag. They might be different in how they approach constructing the bag and what materials are used. However the end result is similar.
Have a look at – this video – for one version or – click here – for another version from – Between the Lines – where the bag is made in leather. It’s one of my favorite blogs. I liked
 |
| You need 3 equal size squares next to each other |
the latter version but I would not use leather (I’m almost vegan) so here is my attempt, but in fabric.
This bag has to be made of sturdy material to hold it’s shape. I used Ottoman, which is ribbed. Then I made a second bag in dark denim and sewed the two together.
This is a reversible bag. The handle was made from a small piece of Bull Denim.
 |
| Triangle Bag Pattern |
You need three squares next to each other. I kept the bag the same size as Between the Lines. I used 3 x 50cm squares next to each other. So
 |
| Fold over to make triangles. |
the pattern piece was 150cm long and 50cm wide.
Next you fold the squares over to make triangles. No way I can explain. Look at the pics or refer to the original DIY mentioned at the beginning of this post.
 |
| Pin and stitch side seams |
Once you have made all the folds, pin your bag and sew the side seams.
I made a second bag to line my bag – and make it reversible – so that would be the next step.
Snip the corners so you bag will open out nicely.
 |
| Make a second triangle bag |
Make sure the right sides are facing and sew the two bags together leaving the ends un-sewn so you are able to turn your bag inside out.
It might be a good idea to pin and double check your fabric is facing the right way before you go ahead and sew. It’s no fun unpicking when
you make a mistake and sometimes the stitches
 |
| Stitch the side edges together leaving the ends free |
leave visible holes that are unsightly.
Pull the bag through so the seams are inside and the right side of the fabric is now facing out.
Stitch the two shoulder straps together. It won’t look good but you are going to cover them so it doesn’t matter.
 |
| Roll a square of hemmed fabric around the shoulder strap at the join |
Cut a square of matching or contrasting fabric and make a hem around it.
Roll the square around where you have stitched the shoulder straps together and hand sew it in place.
And that’s it!
I have a feeling that I am going to be making more of these bags. Much like my other favourite – Slouchy Bag – it’s big and holds everything but the kitchen sink.
But it’s washable and light. Many leather and “must have” bags are great looking but before you even start to fill them, they are back breaking heavy.
For more patterns and ideas to upcycle and recycle visit the Greenie Galleries at the top of this page.
Until next week,
Greenie.