How to add tips to your shirt collars
 |
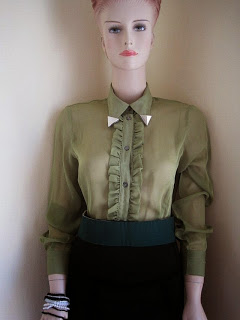
| Olive chiffon shirt with collar tips |
Last week I got going customising shirt collars with collar tips that I bought on-line. (Read last week’s post – here.)
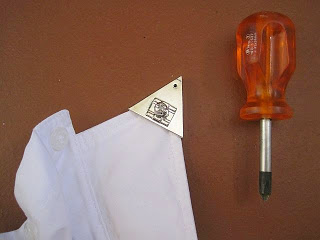
This week is a continuation using a slightly different collar tip that I bought from ASOS. In the last post I mention a couple of places where you can order collar tips. The tips don’t all work the same. The ones I used last week were bent onto the collar with a pair of pliers. This week, I use screw on tips, which is pretty handy coz I can switch them from shirt to shirt.
 |
| Screw on collar tips |
Follow the photos to see how I attached the tips but there is no skill required at all and they are easy enough to figure out. I also mentioned last week that I buy girls school shirts for the best, ever plain white shirts. And since white shirts, with a twist, are big for winter, I thought I would include some links to a couple of past shirt DIY’s.
In – this – feature I show how adding anglaise or lace to a shirt creates a romantic feel.
Another easy way to add a touch of class to a simple white shirt is with a velvet ribbon a la Alexa Chung. See the how-to by following – the link here.
 |
| How to attach the collar tip |
In this next blog post – click here – I used T-Shirts but you could just as easily use two different coloured shirts to create not one, but two, on-trend colour block shirts.
I am seriously tempted to try add a band of gathered white cotton to create a peplum effect on one of my plain white shirts. You can see how I made a peplum top – here.
Or how about cutting the bottom off each sleeve and adding gathered white cotton to make a bell shaped sleeve?
 |
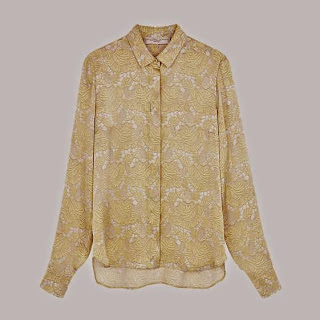
| High-Low effect hem – image source – stellamccartney.com |
Maybe sew contrast colour pockets to the front of you shirt or replace ho hum buttons with neon coloured buttons? Or even restyle the hem creating a High-Low effect like the shirt at the left?
Or you could add elbow patches in a fun fabric?
DIYing is so much fun and the options are limitless to customise and up cycle or restyle clothing.
The clothes in the photo at the top of this post are all from previous DIY’s. You can find the skirt – in this post. The belt can be found – here – and the how-to for the bracelets is in – this link.
There are plenty more ideas to reinvent old clothes and turn anything from wool to wire into fashion items in the Greenie Galleries at the top of this page.
On the top right of this page is a link to the Greenie facebook page. If you fancy these ideas, you may want to give Greenie a “like”.
Till next week, happy DIY-ing.
Greenie.

Loove this post and loove DIY!
Excellent blog! I truly love how it is easy on my eyes and also the info are well written. I am wondering how I can be notified whenever a new post has been made. I have subscribed to your rss feed which need to do the trick! Have a nice day!
cheap evening dresses uk
Thanks for your comments. Much appreciated. You can also subscribe via Feedburner. Below the facebook icon is a "follow by e-mail" option.
All the best.
Greenie.
very cute collar tips, They make simple shirts look expensive.