
How to make rings
This is another DIY project involving buttons following on from last week. You could make both and have matchy matchy rings and earrings. I would have used regular ring bases from a craft or bead shop but I saw this video and I really liked they way Amy used non-bend black elastic. Genius.
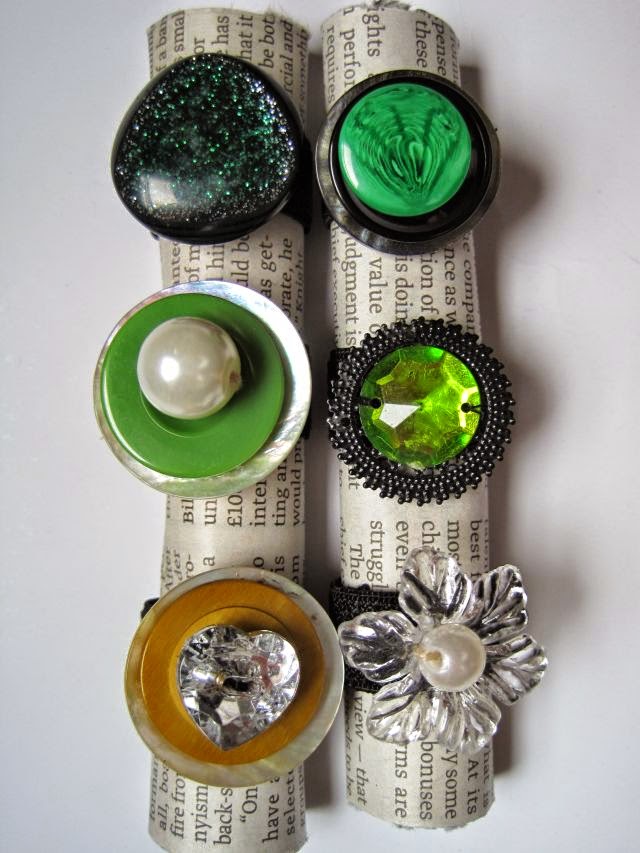 |
| Button Rings |
Here is the video showing how she makes button rings – how to make button rings.
You need to set about hunting down stackable combinations of buttons and beads. Shells and pearls look great together, as do black and antique metals. Wood and faux bone also look great and if your style is more Katy Perry than then you should look at the kiddy buttons for fun, colourful combinations.
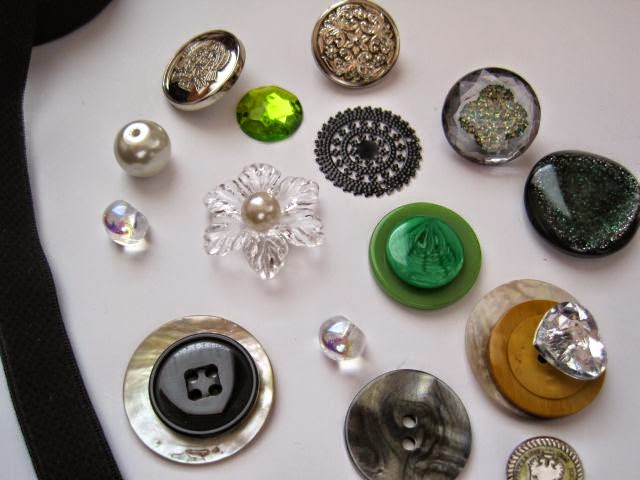 |
| What you need to make button rings |
If you use two or more buttons or beads, they should fit nicely on top of each other. I found a gorgeous flat shank button which you can see in the top left of the above photo. It worked perfectly on it’s own and is my favourite of the lot.
Here is how to make these button rings.
You need: –
buttons to use either alone or to stack
pliers or a wire cutter to cut the shanks off your buttons – if they have shanks
file to file down where the shanks were to create a smooth surface
two part adhesive to glue the top button if using more than one
narrow non-bend elastic to fit your finger
needle and thread
thimble
To make: –
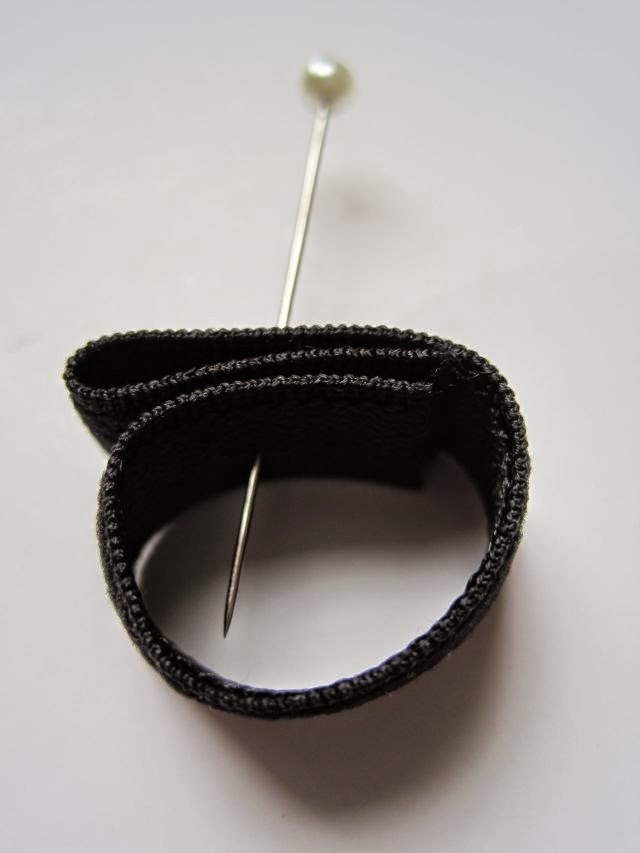 |
| How to fold the elastic |
Wrap the elastic around your finger allowing an extra 2 centimeters. Rather cut a touch too much as you can always trim the elastic afterward. Cut the elastic and then fold back about 1 centimeter and wrap into a rings shape. Have a look at the photo to see what I mean.
Make sure the elastic fits the finger you intend and then sew the non-bend elastic to secure it.
Next stitch your first button to the area where you folded the elastic over. Let me warn you that this folded area is thick and you need a slim needle and a thimble to get the needle and thread through. Another nuisance is the ring is small and fiddling with a needle in a tiny hole is a little bit tricky.
If you are using three buttons, your next step is to stitch the second button on to your ring. The final button, or bead in the case of two of my rings can be sewed on as I did, or glued on. I chose to sew mine on but I reckon glue might have been better as it would hold the buttons together.
To add your last button or bead, remove the shank from your button and make sure to file the shank flat to ensure a smooth surface. Mix your two part adhesive together. I use a match stick and mix the glue on a piece of cardboard such as old food packaging. Drop a mini dollop of glue on top of your second button and quickly add the bead or last button before the glue dries. Allow adequate time for the glue to dry.
And that’s it!
The Greenie Galleries have lots of ideas for DIYing. Find them at the top of this page. And you can “like” Greenie dresses for Less on facebook.
More next week.
Greenie.