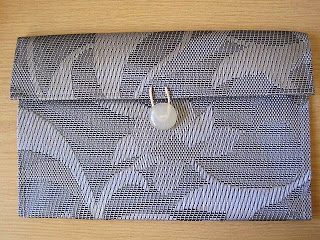
Easy clutch bag tutorial
There are probably millions of fashion bloggers out there. If you trim it down to DIY fashion bloggers the field becomes much narrower. I have a few that I follow. Broadband is slow here and blogs with lots of heavy photos just don’t load. So some blogs I would love to follow but can’t.
 |
| You need a place mat, elastic thread and a button |
I saw this idea quite a while back on Glitter ‘n Glue and stored it away as one I would like to try. See the link for her version here – how to make a clutch bag.
I love metallics. More is more when it comes to metallics for me. Especially silver. This plastic placemat comes from an ordinary home store. I like the bold floral design, the silver finish and it was nice and firm. They also had a black pleather placemat and I nearly bought that as well. You can make this easy clutch bag as follows.
 |
| Fold clutch bag into shape |
You need –
1 x place mat
30cm elastic thread or cord
1 x button
thread in the same colour as the place mat
To make –
Fold the place mat in the shape of a clutch bag.
Leave the top flap open.
Hand stitch the side seams. I machine stitched the side seams as well to make sure the bag was secure. You could glue the sides instead.
 |
| Add button and loop |
Check where to place your button and how long the loop needs to be.
Stitch button in place.
Thread loop through the flap and knot it at each end.
My elastic thread wasn’t thick enough so I ended up using cord.
Fold the top flap over and close your clutch bag.
I left my bag under a weighted tray overnight to flatten it.
Click here – to see how I made this bag with a magnetic clasp. In green!
 |
| Completed clutch bag |
Head back up to the top of this page and find the Greenie Galleries – an archive of old and new tutorials, FREE sewing patterns and crafting ideas.
Share your DIY and up cycling projects on the – Greenie Dresses for Less – facebook page.
See you next week.
Greenie.
